Certificate in Sewing L1 CLEAYDC2110 Joanna Spillman
Weekly outline
-
Welcome to your online City & Guilds Fashion (sewing) course.
Your first weeks here are a chance to familiarise yourself with navigating Moodle. Do contact me (Joanna) if you need help by email joanna.spilman@islington.gov.uk, text, phone 07870 376877 or WhatsApp SewGood1.
This holds most of the assignments I will give you and videos and handouts to help complete them so if you felt you missed something in the class or missed the class altogether its a useful place to come to and catch up.
As well as being able to see the the course and course assignments for each week there is useful information about ACL policy and procedures in the Learner Handbook I would like you to read. This info is also easily available on the islington gateway home page,
When you have done that there are some quizzes below for you to complete so I can get to know you better and see you have read the info. Please do these by week 3 if you haven't done them already and do submit them.
-
Please read the Learner guidance before completing the quizzes.
-
Useful info on islington acl;, your rights and responsibilities, centres, etc.
-
If you or someone you know are at risk of mental or physical harm contact details for help are here
-
-
-
This City & Guilds Level 1 Fashion Course consists of 4 units.
101 - Exploring Design
102 - Sampling Fashion Techniques
104 - Sewing Machine Skills
105/6/7/8 - Making a garment (you can select from making a top, a skirt or trousers)
The assignments each week build towards completing these units and you need to do them all.
Assignments are labelled with a hand under under the box to show you have to hand them in/submit them. Keep hard copies in your folder or sketch book.
Double click on the left hand-side of each title to open docs and videos.
Each assignment has guidance, handouts and most also have videos to help you complete them, any problems or queries contact me by email: joanna.spilman@islington.gov.uk, text: 07870376877 or WhatsApp (Sew Good1) and we can chat/video to resolve any issues.
-
A useful form to list what you need to know and resources you use to develop your design ideas
-
Another form to document your work on the samples you produce: seams, darts, fastenings, etc.
-
Introduction to the course and ACL
Initial Assessment - Prior Knowledge and Learning, H&S, Safeguarding, Online safety etc
Starting a story board
Using the Sewing Machine - Threading
-
Simply the best youtube videos for cutting and making fast fashionable clothes, this one is for a tulle skirt but will take you to lots of other great ideas. Useful for ideas for your storyboard.
-
This video demonstrates how to load and thread the bobbin on a Pfaff Hobby 1122
All machines are threaded differently so you may need to look for specific instructions for your own machine.
Easy to do: Google your machine model number and user manual.
-
Measure yourself
SEAM NEATENING 1: to be started if you have a sewing machine.
Homework: H&S: two documents to read and make notes on.
-
Whether you are using a pattern, copying something or simply cutting its great to measure the wearer first. You can see a few basic tips here but do add additional info that you think is relevant.
-
A selection of useful seam neatening techniques for a range of fabrics.
Read the assignment carefully then use the handouts and videos to complete it.
Each video is very short and covers each sample for the assignment,
-
Read the info in this document to familiarise yourself with some H&S regulations
-
First, read the handouts provided above on Health & Safety guidelines. H&S Regs, COSHH
You may also find it helpful to refer to your sewing machine manual. If you don’t have one they are easy to find online. Just enter your machine make and model into an online search resource and it will come up.* select your chosen unit between the brackets and cross out or delete the others.
-
-
SEAM NEATENING: 2
A range of useful seam finishes. If you don't have a sewing machine don't worry you can do this when we meet, if you do let me know how you get on by emailing pics.
Homework: Research Domestic Sewing Machines
-
A selection of useful seam neatening techniques for a range of fabrics.
Read the assignment carefully then use the handouts and videos to complete it.
Each video is very short and covers each sample for the assignment,
-
-
HEMMING SAMPLES: some hand sewing some machine
-
A video guide to using a blind hem foot for finishing fine and lightweight fabrics with an embroidered shell hem.
-
This is not a required sample for Level 1 but it is useful for knits and jersey fabrics so try it if you like and have a twin needle.
-
Darts
Submitting your assignment samples to moodle for feedback and grading: There are a few docs here to help you see how you can present your work for your course folder and to submit here as pdfs. They vary in style and are simply examples you can reinterpret to suit you. Follow the specific instructions in each assignment and include all the information to avoid me asking for more!
Units 101 (design) and 102 (fashion) are simply Pass or Fail. Units 104 (sewing skills), 105/6/7 or 8 (garments) can be graded Fail, Pass, Merit or Distinction. Your grade will depend on the quality of your presentation which includes not only the samples but also the supporting evidence asked for in each assignment.
Its half term next week so there's time this week to get up to date with your assignments.
-
If you don't have pattern pieces you can use these templates to make your single and double pointed dart samples.
-
Use this to submit your presented darts with supporting evidence as a pdf. Keep the hard copy in your course folder.
-
STORYBOARD 1: RESEARCH
This should be submitted this week ready for us to discuss and plan your individual projects after half term
-
1:1 REVIEWS AND PLANNING INDIVIDUAL PROJECTS
There are assignments each week this half term but they shouldn't take too long so there will also be time to work towards the garment you have chosen to make. We can do this 1:1.
Each assignment covers a very useful topic for your future sewing. They may not always seem relevant to what you want to do now but they will be so useful as you progress.
COLOUR THEORY: Colour wheel, gradations/hues and accent colours
Complete hard copies of all three assignments, add notes then take photos and submit as pdfs. Any problems submitting docs email them to me: joanna.spilman@islington.gov.uk
There is a block on the right just above this week with a link you may find interesting and helpful.
ONLINE PATTERN BUYING: are you ready to start your garment? There are a couple of examples of patterns and instructions to show what you can find on the internet for free.
-
There are 3 PRIMARY colours: BLUE, YELLOW and RED. These cannot be made although they can be altered by adding other colours. Add yellow to blue and you get what is called a SECONDARY COLOUR = GREEN and so on.
Use this template to demonstrate your understanding of this. The colours that appear opposite each other in the wheel are called COMPLEMENTARY COLOURS = BLUE and ORANGE, etc.
When you have finished the wheel write WARM and COOL on opposite sides of it to show which colours belong in each group.
-
A template for you to complete to show your understanding of accent colours.
-
Once you know the garment you are going to make you will need a pattern. We have some patterns at DRCR you can use and adapt, alternatively you can copy a garment or provide a good sketch with measurements and make your own pattern.
-
Occasionally you can find GOOD free patterns online. If you do send or bring the link to class and we can add it to this list
-
-
One to One Tutorials - Learning Reviews
Visual texture and fabric colouration
Fabric grain and Nap - do read this hand out before buying fabric and cutting out.
-
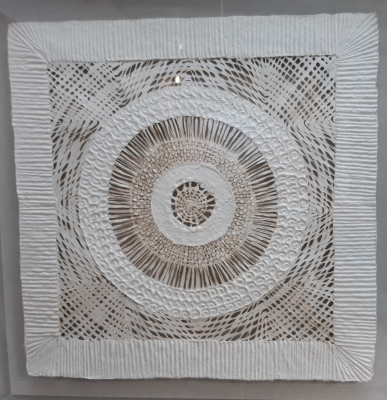
A very monochrome example of what you can do with paper or fabric. I don't expect anything this complex it is just to get you thinking about the possibilities.
-
-
Applique: send pics please and add notes/comments on what you used, did and thought about it. More info in the assignment box below.
If you're not sure whether you are on the right track email images of work in progress and I can give you feedback.
And if you don't have the accessories (a darning foot and quilting guide) for some projects don't do them. Use the resources you have.
You have 2 weeks for this assignment to allow some time for you to work on your garment storyboard as well.
-
A short video demonstrating how to use a darning foot and darning plate (or dropped feed-dogs) for free machine embroidery.
-
A useful link to many hand embroidery stitches with brief diagrams and videos that may help with the applique project. Don't worry if you haven't got an embroidery hoop, you'll be fine for this project.
-
A short video to demonstrate how to stitch parallel lines using a quilting guide.
-
Snaps/Press Studs
Hook and Eye
A nice bit of hand sewing: You may find the hand out on buttonhole stitch easier to follow than the videos so go to that first.
If you finish this quickly move on to Presenting Your Samples: see next week.
-
This is a great hand stitch to learn, quick and strong. Use it for your fastenings.
-
A quick Demo on preparing to attach snap and hook and eye fastenings. Click on the button to view.
-
Use this to submit your presented fastening samples with the supporting evidence as a pdf. Keep the hard copy in your course folder.
-
Elastication and shape
Inserting elastic into a stitched band
Stitching Picot edged elastic to lightweight fabric
A couple of quick and easy samples for the end of term and to allow a bit of catching up on any uncompleted projects and
Presenting your samples
Although we do a lot online it's important to have your samples ready for assessment with notes on what you used, how and why, H&S considerations and how you feel about the results. All ready for a tutorial next term!
There are examples in week 5 to help you present your work to it's best.
Research The Impact of Fashion and Textiles Industries on the environment and sustainability
Some interesting and possibly eye opening research to entertain you over the break. Submit your assignment in pdf to moodle for feedback and sharing the best links.
-
Picot edged elastic tends to be used on lightweight fabrics, eg lingerie, light tops, etc.
Very easy to use and combines hemming and stretch.
-
This is a lovely easy way to gather fabric. Its not a Level 1 requirement so you don't have to make a sample but its good to know about and you may want to use it for your garment so handy to have it here.
-
Pin tucks and plain tucks
Story board 2: Making Your garment.
This term you will start making your garment for either unit 105, 106 or 107 and work on that at the same time as the samples.
Pattern terminology/symbols and Fabric grain and nap, do read these hand outs before buying fabric and cutting out
-
A short video to show you how to make plain 1cm tucks. If you have a quilting guide you may find it useful here.
-
A variety of body templates to choose from. You can print out or copy into a document and draw directly onto them or use grease paper (baking paper) as an alternative to tracing paper to experiment with your drawings and present them as overlays in your storyboards.
-
-
ZIPS: Centred and Lapped and Selecting Presser Feet
One to One Tutorials - Learning Reviews
Tools and Equipment: Choosing machine needles, threads and selecting tension settings
Knowledge Check
-
BUTTONHOLES
GARMENTS - UNITS 105/6/7
Complete the set assignments and continue to work on your individual garment.
-
How to sew a buttonhole using a one step buttonhole foot. And then so much more, tips on tension, zips, accessories, applique, embroidery. Well worth a look, skip the adds and forward to advice on numerous techniques.
-
The best way to sew on a button by hand to make sure it lasts, includes creating a shank.
-
There are different buttonholes for different fabrics and uses. This guide has a lot of information if you want to learn more than the basics about buttonholes
-
This assignment is an opportunity for you to demonstrate how accurately you measure, cut and stitch your pieces together'
Use the assignment instructions and the videos to help complete the project.
Present the finished sample with notes and photos taken during the process.
-
Templates for cutting fabric and interfacing and instructions on how to complete the assignment.
This includes using bias binding for finishing round edges neatly.
You can use this sample for easing too, see week 7, cut a sleeve and ease to fit one armhole and bias bind the other.
-
-
Facings continued and see week 7 - easing
-
A demo to show how and why we use under-stitching and bias trims.
-
-
Individual projects - Unit 105/106/107 or 108
Sharing homework and assignments
-
Folder presentation: There are some examples of how to present your work in week 5, term 1.
Some supporting evidence to complete and time to work on your individual projects.
Remember the supporting evidence, what you used and how, H&S implications and your evaluations, eg how well you completed the projects and how you could use them, are all as important as the samples and will improve your grades.
-
This form is in the Statement of intent assignment folder and if you use it submit it from there.
-
So I can find things quickly in your folders for assessment we use the sheets in this folder to show where your evidence is. There is one for each unit and you only need 105 - 108 according to the garment you are making. They look quite complicated but do help you see exactly what you need in your folders and where to put it. Don't worry about page numbers yet and some samples could be in more than one unit.
-
Some supporting evidence to complete and time to work on your individual projects.
-
Submit assignments as pdf's, completed or work in progress here or to joanna.spilman@islington.gov.uk if you're not sure whether you are on the right track send images of work in progress and I can give you feedback.
1:1 tutorials: folder checks and garments. Next steps.
H&S and equipment care Q&A's
-
Individual Projects: unit 105/6/7/8
You all have different garments to work on so 1:1 tutorials
-
PATCH POCKET
4 square patch
Bias trim with Piping
-
Patch pocket: bias trim and piping
-
-
How to make a sample gathered lower sleeve and cuff with button loops.
Assignment Instructions and pattern templates.
-
-
Gathering- The sleeve to the cuff and finishing
-
Completing projects and presentation.
-
Final assessments: have your folders and sketch books ready for 1:1 assessments
-
Assessments, presentation
-
1:1 Assessments and completing projects
-
1:1 Assessments and completing projects
-
-
Here you can see links to some reasonably priced private courses and classes where you can learn particular techniques.
-
-
Additional projects that might interest you but be sure to keep your course work up to date first, these are not required elements.
